DIY Tutorial: Make a Squishy in paper
Equipment:
- Paper in different colors (but you can use white paper and colored markers according to your own designs) - You can also print and color patterns
- Glue stick (for decorations)
- Adhesive paper - Scotch transparent
- Padding - Cotton or wadding from an old pillow for example
- Scissors (Ask an adult for help in handling them)
- Glue stick (for decorations)
1. Draw and cut your Squishy :
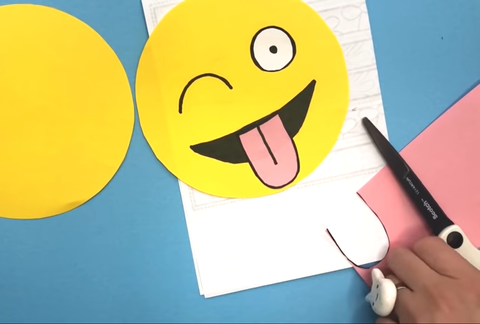
Draw both sides of your Squishy, add your favorite colors and patterns and cut out the models using the scissors.
Cut your decorations on another sheet of paper and paste them on your basic model, you can also draw directly on your pattern.
2. Cover your Squishy with adhesive paper to reinforce it:

Overlap the two sides of your Squishy and cover them entirely with adhesive tape, being careful to stick the edges to obtain a result similar to the photo below:

Leave an opening on top to be able to stuff the Squishy
3. Refund your Squishy :
Repay your Squishy with the filling of your choice, here we use cotton from an old pillow. Fill it properly, leaving a little air inside.

4. Close your Squishy Have fun !
Now just close the opening with adhesive tape

And you can play with it!

You can directly download your patterns and use them to make your Squishy in paper from our coloring book available for free in by clicking here
Find the video tutorial below:
We thank redtedart for this tutorial!